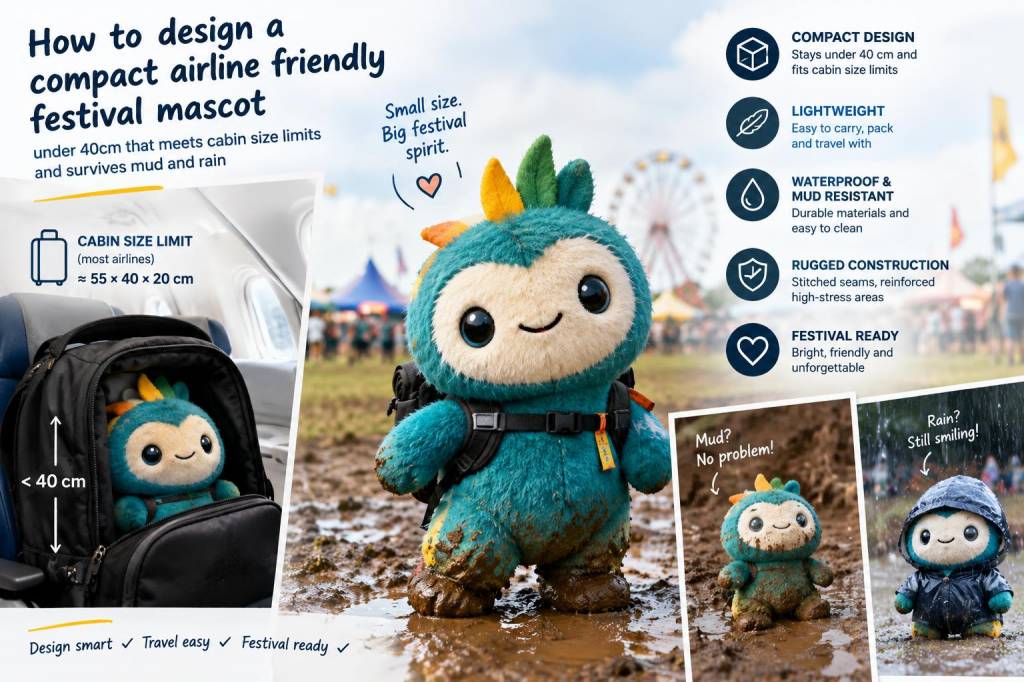
I’ve travelled to more folk festivals than I can count, often with a pair of needles and a tiny knitted mascot tucked into my bag. Over the years I’ve learned that designing a festival mascot that’s both charming and airline-friendly takes a little planning: it must stay under cabin size limits (I aim for under 40 cm tall), survive mud, rain, and stageside chaos, and still arrive looking like the same character I knitted at my grandmother’s knee. Below I share practical design choices, materials, construction tricks, and packing and care tips that will help your mascot cross borders, slip into overhead lockers, and come alive in festival fields instead of becoming festival field compost.
Why under 40 cm?
Most European and UK airlines set carry-on dimensions that make a compact mascot easier to stow in an overhead bin or under a seat. By keeping the finished height and length under 40 cm, you give yourself a lot more flexibility when gate agents are judging what fits. I also find that smaller mascots are easier to photograph on busy festival days, fit into instrument cases or rucksack pockets, and are less of a security headache.
Design principles for an airline-friendly mascot
- Compact silhouette: design a squat, rounded body rather than long legs or trailing scarves. A low centre of gravity resists being knocked over and compresses better for packing.
- Detachable elements: make hats, backpacks, or instruments removable. They can be stored separately to protect delicate pieces and reduce bulk in the main body.
- Non-protruding features: avoid long antennae, wire-based limbs, or button eyes that can snag or be deemed unsafe. Embroidered or felt appliqué faces are best for travel.
- Reinforced contact points: feet, hands, and seams should be strengthened to withstand being tugged, sat on, or wiped of mud.
- Quick-dry and washable: choose materials that dry fast and handle a rinse in a sink or a machine gentle cycle.
Yarn and fabric choices that survive mud & rain
Choosing the right fibre is the single biggest decision. Here’s what I use and why:
- Acrylic-wool blends: marry warmth and traditional look with better weather resistance than pure wool. They dry faster and tolerate more washing. Brands like Rowan or King Cole do lovely blends that block up well.
- Superwash merino carefully used: soft and pleasant, but overtreated merino can pill; pick a tighter-spun DK or aran and consider double-stranding for durability.
- 100% acrylic for heavy-duty parts: for feet and hands that will meet mud, durable acrylic yarn (eg. Stylecraft Special DK) is forgiving and easy to wash and scrub.
- Felt and waxed canvas: for soles, backpacks, or storm hoods: small felt or waxed canvas patches reinforce. Waxed cotton (even a scrap from Barbour-style gear) is great for a tiny waterproof cape.
- Waterproof treatments: you can use a Durable Water Repellent (DWR) spray like Granger’s or Nikwax TX.Direct on outer garments (not on delicate wools). Test on a swatch first.
Stuffing and structure
How you stuff your mascot affects weight, squishability, and the ability to compress for travel.
- Hollowfibre/polyester fill: light, inexpensive, dries quickly. Choose low-loft or medium-loft depending on how firm you want the mascot. Hollowfibre is great for heads that need to retain shape.
- Wool roving for shape retention: a small inner core of wool roving helps maintain silhouette and gives a traditional hand. It’s heavier and takes longer to dry, so keep it minimal.
- Foam inserts: thin high-density foam disks or rods create structure for the base so the mascot can stand on wet grass without sinking through. Wrap foam in water-resistant fabric.
- Compartmentalised stuffing: use internal baffles (knit or sewn) to keep filling from migrating when the toy is squashed into a bag.
Construction tips for durability and travel
- Work smaller needles for denser fabric: denser knitting is more weather-resistant and won’t snag as easily. If your pattern calls for 4 mm, try 3.75 mm for a tighter stitch.
- Use mattress stitch and reinforced seams: mattress stitch gives a neat join; add a second line of running stitch inside high-stress seams.
- Embroidered faces: choose embroidered eyes and mouths over buttons to prevent choking hazards and airline security concerns.
- Double-up yarn at soles and hands: knit soles or palms in double yarn or a tougher yarn to protect against damp ground.
- Include a washable lining: a removable lining (thin cotton or microfleece) lets you take the worst of the dirt out before a full wash. Attach with a few discreet snaps.
- Use invisible zips or button loops: a small zipped base makes de-stuffing for travel or washing much easier. Choose a plastic coil zip so it’s flexible and lightweight.
Packing, carrying, and airline considerations
Before flying, check your airline’s carry-on rules — they vary. I always pack my mascot in my personal item (a daypack or tote), with these measures:
- Remove detachable pieces: hats, sticks, tiny instruments go in a small zip bag to prevent losing them.
- Compress correctly: place the mascot face-up in the centre of folded clothes; don’t squish the head too much — push in gently around the sides so most pressure is on clothes, not facial features.
- Protect dampness: put the mascot in a breathable dry bag (Sea to Summit or similar) if it’s been exposed to rain. Breathable bags avoid mildew better than sealed plastic.
- Declare when necessary: if you have wires, small batteries, or unusual attachments, be ready to take them out and explain; simpler is always smoother through security.
On-site festival survival: mud, rain, and curious hands
- Carry a microfibre towel and small brush: a compact towel (like PackTowl) and a soft toothbrush let you lift mud off before it sets. Gently brush dried mud away—don’t rub it into the yarn.
- Spot-clean with Nikwax or Wool Wash: for wool blends use a gentle wool wash (Eucalan, Nikwax Wool Wash) in a basin; for acrylics use a mild detergent. Rinse well and squeeze by rolling in a towel.
- Quick shelter: keep a tiny waterproof poncho or hood in your kit to throw over your mascot if a shower starts.
- Secure display: carry a small wooden block or picnic peg to anchor the mascot to stall tables so wind or curious fingers don’t send it tumbling into mud.
Patterns and gauge tips
I tend to design mascots with an easy-to-alter pattern so you can scale height without upsetting silhouette. For a mascot under 40 cm:
| Head circumference | 18–22 cm (tight gauge for a firm head) |
| Body width | 12–16 cm (keeps it squat and packable) |
| Leg/arm length | 6–10 cm — short and sturdy |
When changing yarn weight, always swatch: a DK worked on slightly smaller needles will give a sturdier toy than the same DK on very large needles.
Final practical checklist before you leave
- Remove and pack detachable accessories in a labelled zip bag.
- Place mascot in a breathable bag or wrapped in soft clothing.
- Bring a tiny care kit: towel, soft brush, small detergent, safety pins, spare thread.
- Check airline carry-on rules and security liquid/battery rules if you’ve added electronics.
- Label your mascot discreetly with your email or a luggage tag — lost mascots find their way home more often with a name and contact.
Designing for travel sharpens your sense of what a character really needs to be. Strip away the superfluous flourishes, make strong choices about materials, and think in terms of compartments and repairability. You’ll end up with a small, resilient mascot that carries its own story to stages, stalls, and campfires — and still looks lovable when the sun comes back out.