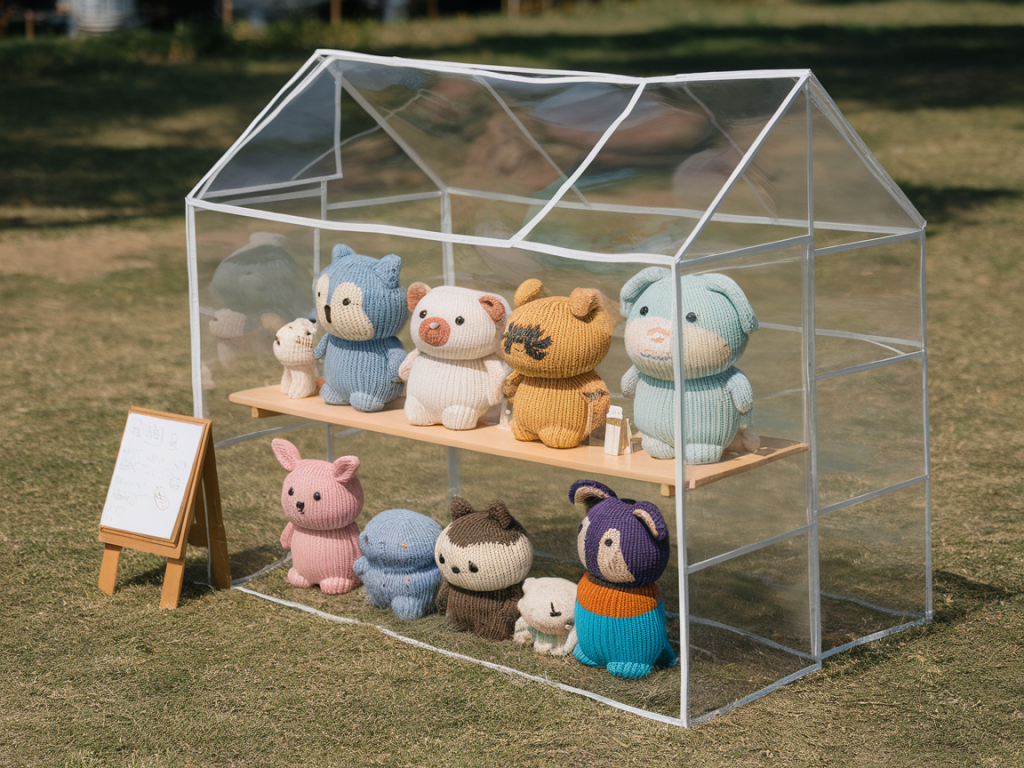
I’ve learnt the hard way that a beautiful knitted character can be ruined in a single festival downpour or by an over-enthusiastic toddler. Over the years I’ve developed a foldable display that travels easily, sets up fast, shelters my pieces from rain, and keeps curious hands at bay while still inviting conversation. Below I’ll walk you through the choices I make, the materials I prefer, and the practical steps to design a display that’s sturdy, portable, and festival-friendly.
What I want from a festival display
Before sketching anything, I ask myself what really matters on a festival pitch: protection, visibility, portability, and warmth. By warmth I mean that the display should feel like an extension of the knitted characters’ world — tactile fabrics, soft lighting, and hand-written labels help sell the story. Practically, I want:
- A folding structure that fits in my car and is light enough to carry alone.
- Weatherproofing against rain and spray, but with ventilation so things don’t mildew.
- A barrier to prevent constant handling while still allowing close photos and conversation.
- Quick assembly and dismantling — festivals are long days.
Basic design: foldable frame + removable weatherproof cover
I settled on a two-part idea: a rigid, fold-flat frame (think camp folding table or collapsible shelving) and a removable transparent weatherproof cover. The frame gives structure and a stage for my characters, while the cover keeps rain off and acts as a clear barrier between visitors and textiles.
My favourite handheld size is a 3-panel fold-flat stage about 120cm wide and 60cm tall when opened. It’s big enough to show a small scene but still fits on a standard table and in a car boot. The panels hinge together and fold into a compact rectangle. I mount shallow shelves or straps inside the panels for arranging characters at different heights.
Materials I use and why
Choosing materials is a balance of weight, durability, and cost. Here’s a table comparing common options I’ve tried:
| Component | Option | Pros | Cons |
|---|---|---|---|
| Frame | Plywood (6–9mm) | Sturdy, easy to paint, holds fixings well | Heavier than alternatives |
| Frame | Foamboard or coroplast | Very light, waterproof (coroplast) | Less rigid, can flex with wind |
| Hinges | Metal strap hinges | Durable, smooth fold | Requires screws and reinforcement |
| Cover | Transparent PVC sheeting | Fully waterproof, clear visibility | Can look industrial, traps heat |
| Cover | Polycarbonate glazing sheets | Rigid, clear, scratch-resistant | Heavier and more costly |
| Barrier method | Acrylic front panel | Strong, feels ‘museum-like’, easy to clean | Fragile to drop, heavier |
In practice I’ve settled on 6mm plywood for the frame (light but strong), lined with felt for a cosy backdrop, and a detachable PVC clear front that zips on with velcro or toggles. For markets where weight is paramount I’ll use coroplast panels with a taped seam cover.
Design details that protect knitted pieces
Keep in mind that knitted textiles are fragile in two ways: water and touch. Here are the design elements I incorporate:
- Sloped top: Make the top panel slightly sloped (5–10°) so rain runs off rather than pooling.
- Raised shelves: Mount characters on thin plinths or shelves at least 5cm from the backing to help circulation and keep them away from splash zones.
- Removable clear front: A clear panel prevents hands-on handling. I use a zippered PVC cover edged with weatherproof velcro so I can unzip the top for close-ups or photography while keeping the lower half closed.
- Ventilation: Add small vents at the top and bottom or breathable mesh side panels to stop condensation forming behind the clear sheet.
- Weighted base: Especially on a windy day, add fold-flat weights or clip-on sandbags to the base so the display doesn’t topple.
- Separate storage for spares: Keep a waterproof tub under the table with spare labels, repair kits, and a microfibre cloth.
Interaction without damage
People love to touch knitted things, and I’m flattered. I also want to keep my characters intact. Here are strategies that respect curiosity without sacrificing safety:
- Use a clear front with a small hinged flap at adult waist height. That allows a finger to demonstrate texture briefly under guidance but prevents diving hands.
- Have a “Meet Me!” sample square: a small, replaceable swatch of yarn and a tiny knitted creature on a string that visitors can touch. It’s tactile and sacrificial — if it gets worn, I replace it.
- Signage that’s friendly and inviting: “Please ask to touch — I’d love to show you how these are made.” People respond better to warmth than to “Do not touch.”
- Offer short demonstrations with a stool and a hand-washing gel nearby; festival-goers appreciate the context and the chance to try a stitch.
Packing and transport tips
Part of the design is making sure it folds and packs without damage. My checklist when packing the display:
- Wrap the clear PVC in a soft cloth to prevent scratches.
- Pad the frame edges with bubble wrap; strap the folded panels together with cam straps.
- Pack characters in labelled tissue-paper envelopes inside a rigid tub with a sealable lid.
- Bring extra fastenings: velcro, zip ties, a small toolbox with a drill and spare screws, and some marine-grade tape for emergency waterproofing.
Lighting, storytelling and finishing touches
Good lighting changes everything. I use battery-powered, warm LED strip lights (USB rechargeable) clipped inside the top edge. They’re low-heat, so they won’t damage yarn, and they run for hours. For signage, I prefer kraft paper tags handwritten with a dip pen or water-resistant marker — they feel handmade and fit the folk festival mood.
Finally, integrate the display into your overall stall: soft textiles on the table, business cards in a small wooden tray, and a short card explaining the story behind each character. The display protects the pieces, but the stories sell them.
If you’d like, I can sketch a simple dimensioned plan for the 3-panel stage I described, or suggest specific sources in the UK for materials and zippers (I often use Wickes for plywood and Screwfix for hinges; for clear PVC I buy from a boat chandlery — it’s marine grade and lasts).