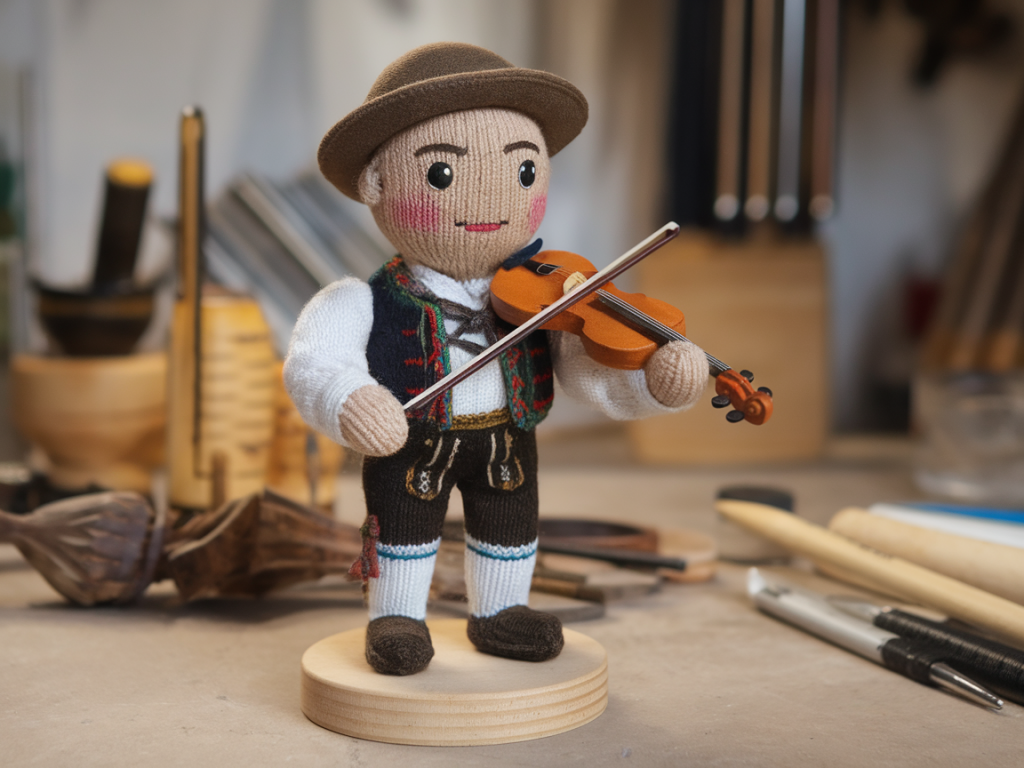
I love the challenge of making a tiny musician who not only looks like they belong on a festival stage but can also hold a fiddlestick between their hands and survive the enthusiastic handling that happens during workshops. Over the years I’ve stitched, wired, and adjusted dozens of posable knitted characters for maker stalls and community classes, and here I’ll share what I’ve learnt so your fiddler can both play and withstand the hands-on fun.
Think of the doll as a little performer
When I design a posable folk musician, I try to imagine them performing: weight distribution for standing, a convincing hand posture for gripping, a neck that tilts when the music moves them. That theatrical mindset helps guide practical choices—where to add internal structure, which parts need stronger joins, and how to sculpt hands that can actually hold a tiny fiddle.
Scale and proportions matter
Decide your scale up front. I favour a 12–20cm finished height for workshop-friendly fiddlers—big enough to handle, small enough to knit quickly. Keep limb length and hand size proportional to the instrument. If your fiddle is 3–4cm long, the hands must be large enough to wrap a finger around the neck; anything smaller and you’ll fight puppet physics.
Materials that survive handling
Choice of yarn and internal supports are the two most important decisions:
Yarn: Choose a sturdy, slightly fuzzy yarn that masks minor seams and felting. A DK wool or wool-blend (like Stylecraft Special DK, or Rowan Pure Wool DK) offers resilience and stitch definition. For workshops with beginners, wool blends that can be washed are forgiving. Avoid slippery acrylics for hand joints—too slick to stay in position.Stuffing: Use high-quality polyester hollowfibre (e.g., Hobbii or Toy Maker brands) for consistent loft, and consider a small core of wool roving in the torso to give a slightly heavier, weighted feel.Internal wire: 20–24 gauge annealed floral wire works well for armature inside limbs. It’s sturdy but bendable. If you want extra strength at joints, use craft-grade steel wire for core and softer wire wrapping over it.Joint reinforcement: Thin nylon-coated beading wire or cable ties (cut to length) can be used inside limbs to prevent wire poking through.Fine tools: Small pliers, a needle-nose crimper, and jewellery crimps for locking wire are essential if you make many dolls.Building a posable skeleton
I use a hybrid approach: a flexible internal armature encased in knitted tubes that are securely closed and anchored to the body. This gives real poseability while keeping the doll soft and safe for workshop participants.
Make the limbs longer than you need when knitting—leave a tail of yarn for grafting. Thread a length of 20–22 gauge wire through the limb so it runs from shoulder to hand (or hip to foot). Leave 1–2cm of wire forming a loop or wrapped tab at the end; this helps anchor to the fabric when you sew it into the torso.Crimp a tiny jewellery crimp at the wrist end if you can—this prevents the wire from working out through the knitted fabric with repeated bending.Where limbs join the body, use a “wrapped wool” anchor: insert a small cork of wool roving inside the torso cavity, and wrap the protruding wire loop around it before stuffing firmly. This gives a soft but immovable anchor that absorbs pulling stress.Hands that can grip a tiny fiddle
Hands are the trickiest bit. I aim for a simple, stylised hand with a thumb and a slightly cupped palm rather than trying to knit tiny fingers—this is more durable and easier to teach.
Knit a small mitten-shaped hand, leaving a long tail. Before stuffing fully, use a felting needle to define a slight thumb ridge on one side; this forms a nook for the fiddle neck.For even more grip, embroider a thin strip of suede or faux-suede across the palm using a little fabric glue (Fray Check or textile glue) hidden under the yarn. The suede gives friction without looking industrial.If you do want fingers, make them by working short tubular fingers knitted in the round, stuffing lightly, then sewing them to the palm in a half-closed gesture. Reinforce with a tiny piece of wire inside the thumb for posing.Designing the tiny fiddle
My fiddles are usually made of balsa wood, polymer clay, or layered felt. They must be light and shaped so hands can hold them without slipping.
Balsa wood: cut a small shape (roughly 3–4cm), sand edges smooth, and varnish with a matt sealant. Glue a thin dowel or toothpick as the neck; sand and test for splinters.Polymer clay: great for sculpted detail—bake properly and seal. Clay fiddles are robust but slightly heavier; keep the size small to avoid torque on the hands.Felt: layered and stitched felt can be surprisingly convincing and soft. Glue a plywood toothpick neck for stability.I usually attach a tiny loop of embroidery thread to the back of the fiddle so it can be button-looped around the character’s shoulder strap or lap, helping keep the instrument in place during handling.
Joint techniques for frequent posing
There are several ways to make joints durable under repeated bending; choose based on your workshop's skill level.
Sewn-on limbs: Sew limbs securely to the body with a mattress stitch and a large anchoring knot inside the torso. This is sturdy but less posable at the shoulder.Button joints: Using small buttons with a length of strong thread or embroidery floss allows rotation. Use wooden or shank buttons and cover them with yarn for aesthetics.Embedded wire: Best for full poseability—wire loops anchored into the torso's wool plug give flexible rotation and are the strongest option for frequent handling.Finishing touches that matter
Small details make a fiddler feel alive and help with durability:
Reinforce seams with a drop of fabric glue hidden inside shoulders and wrists—this prevents fraying without making the surface stiff.Use wool or yarn felting for hair and beards; glued synthetic hair can pill with handling.Stitch clothing as removable pieces where possible. Tunics and waistcoats protect the body from grubby hands and can be machine-washable if you use sturdy cotton blends.Label the base of each doll with a tiny sewn tag: “Workshop Model” and a care symbol. It helps participants understand these are meant to be loved and looked after.Workshop logistics and troubleshooting
When I bring these designs to a class or festival stall, a few practical choices save a lot of grief:
Prepare kits with pre-cut wires, pre-shaped fiddle parts, and a yarn ball that’s already wound into a small project-sized cake. This keeps sessions moving.Allow 1.5–2 hours for a beginner-friendly session where participants knit tubes and stuff limbs; provide a pre-made body and fiddle for them to attach if time is tight.Have spare fiddles, glue, and replacement wires. I always keep a simple repair kit at my table—tweezers, tiny pliers, spare crimps, needle and thread, and a dab of PVA.If arms go floppy after repeated posing, it’s often the wire working out. Replace with a slightly thicker gauge and re-anchor into a fresh wool plug. | Item | Suggested choice | Why |
| Yarn | DK wool or wool-blend | Durable, pleasant texture, hides seams |
| Wire | 20–24 gauge annealed | Flexible but strong |
| Stuffing | Hollowfibre + wool roving core | Light with a weighted torso |
| Fiddle | Balsa or polymer clay | Lightweight, shapeable |
Designing a posable knitted musician that grips a fiddle and survives workshops is part engineering, part costume-making, and part storytelling. Above all, test, fail, and tweak—the best fixes often arrive at the table during a repair session with a cup of festival tea and a friendly maker beside you.